Skip to content

Unit: Resilient tiles

LMFFL2302A: Install resilient resilient tiles using standard installation practices

Section 2: Square layout techniques

Finding the starting point
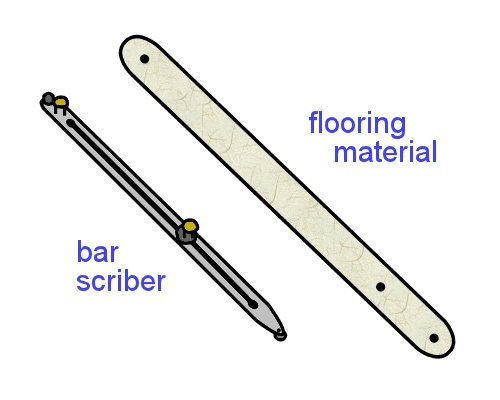

Image for slide 1
Audio for slide 1 (mp3 |6|KB)
The traditional place to start the set out is from the centre of the room or area to be tiled.

The first thing you need to do is find the centre point and draw two lines at right angles to each other.

hearing icon
Image for slide 2
Audio for slide 2 (mp3 |6|KB)
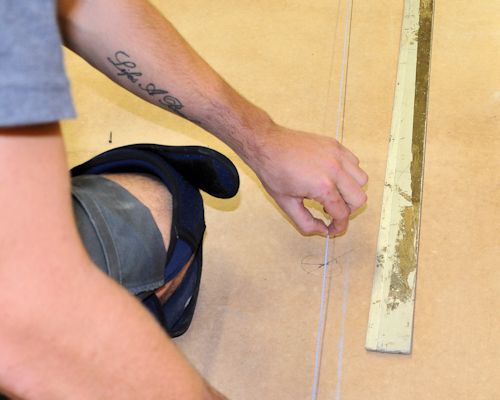
The marking gauge you use should be a reasonable length, so that there is minimal margin for error.

Some installers use a piece of flooring material about one metre long.

Note that the material must be able to keep its shape and not stretch.

In small areas you could use a bar scriber set to its full length.

hearing icon
Image for slide 3
Audio for slide 3 (mp3 |6|KB)

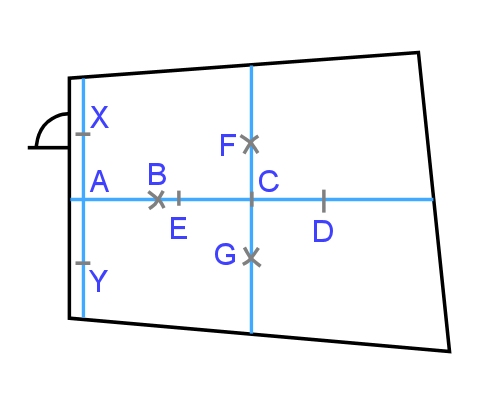
If the room is a standard rectangular shape

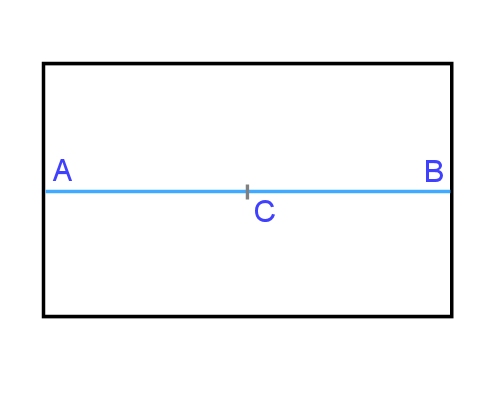
  1. Measure the length of two opposing walls and mark the centre point of each wall (A and B).
hearing icon
Image for slide 4
Audio for slide 4 (mp3 |6|KB)
  1. Strike a chalk line between A and B and find the centre point (C).

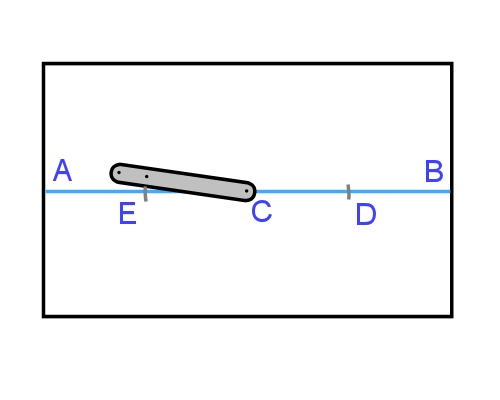
  2. Put one end of the gauge on C and mark two points on the line the same distance apart (D and E). About 200 mm from C is a good distance.
hearing icon
Image for slide 5
Audio for slide 5 (mp3 |6|KB)
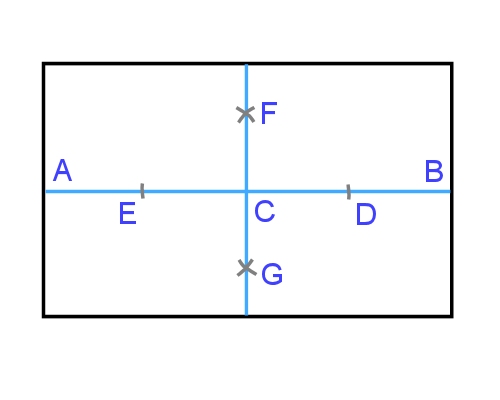
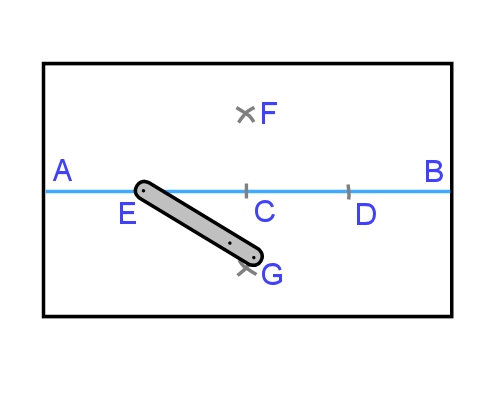
  1. Use the full length of the gauge and scribe intersecting arcs (F and G) from both D and E.

  2. Strike a chalk line between F and G.
hearing icon
Image for slide 6
Audio for slide 6 (mp3 |6|KB)
Note that if you had simply found the centre point of the other two walls and drawn a line between them, you wouldn't be able to guarantee that the intersecting lines were at right angles, because the walls themselves may not be exactly the same length or parallel.

This is why you must start with a baseline (AB) and create an intersecting line (FG) that's at right angles to the baseline.

If the room is perfectly symmetrical, FG will be parallel to both end walls - but if the room is slightly out of square, it won't affect the squareness of your two centrelines.

hearing icon
Image for slide 7
Audio for slide 7 (mp3 |6|KB)

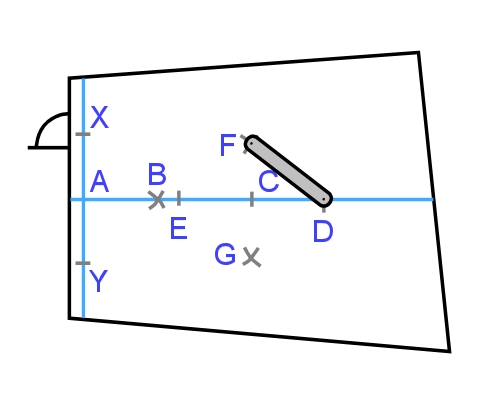
If the room or area is an irregular shape

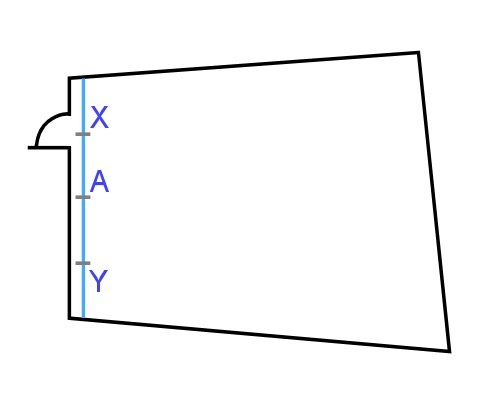
  1. Strike a chalk line parallel to the wall that has the main entrance door, about 75 mm out from the wall. Find the centre point (A).

  2. Mark two points (X and Y) an equal distance from A using the marking gauge.
hearing icon
Image for slide 8
Audio for slide 8 (mp3 |6|KB)
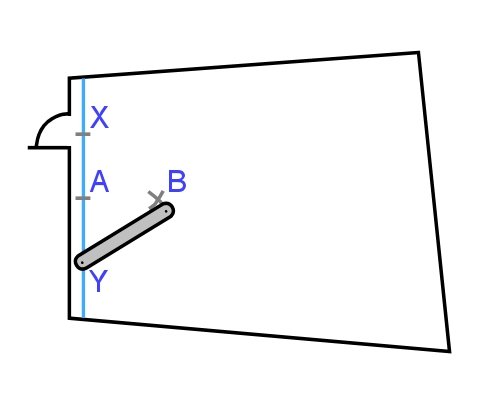
  1. Mark intersecting arcs from X and Y, making sure it is a reasonable distance out from A. The intersection will be point B.
hearing icon
Image for slide 9
Audio for slide 9 (mp3 |6|KB)
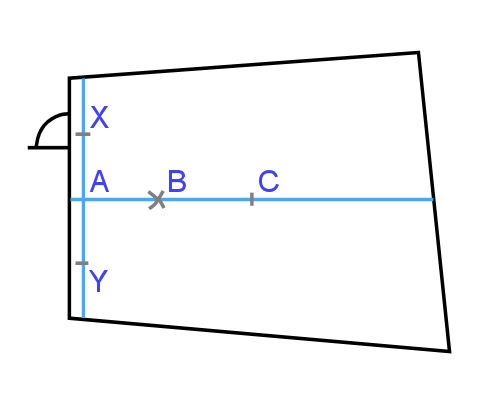
  1. Strike a chalk line from A to the opposite wall, passing through B.

  2. Find the mid-point of the line (C).
hearing icon
Image for slide 10
Audio for slide 10 (mp3 |6|KB)
  1. Mark two points either side of C, the same distance apart (D and E).

  2. Scribe intersecting arcs (F and G) from both D and E.
hearing icon
Image for slide 11
Audio for slide 11 (mp3 |6|KB)
  1. Strike a chalk line between F and G.
hearing icon
Image for slide 12
Audio for slide 12 (mp3 |6|KB)

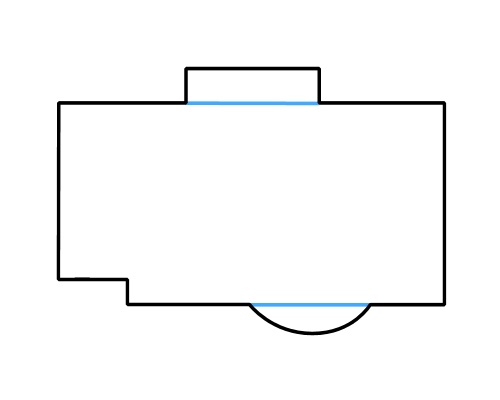
If the room has recesses or projections in the side walls:

  1. Strike 'false' wall lines to give the room a regular shape.

  2. Follow all steps for either the standard rectangular shape or irregular shape listed above, using the false lines as reference marks for the side walls.
hearing icon
Image for slide 13
Audio for slide 13 (mp3 |6|KB)

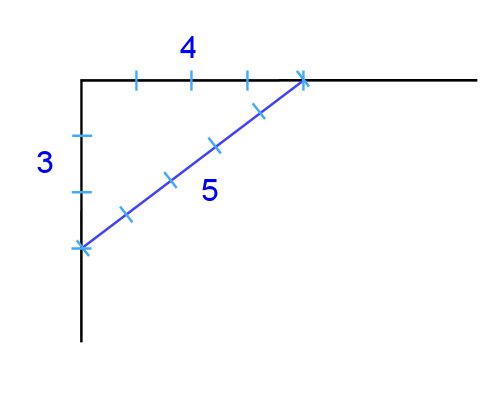
Using the 3, 4, 5 rule

Some installers use the '3, 4, 5 rule' - also called 'Pythagoras's theorem', to find a right angle to another line or wall.

For more details on this technique, and a fuller description of the principles of squareness and right angles, see 'Angles' in the unit: Making measurements.

hearing icon


Learning activity

Audio 14 (mp3 |6|KB)

Go to the Armstrong Floors instruction video clips at the following link:

Vinyl installation videos

Select the 'Vinyl tile installation' tab under the media player and then click on 'Vinyl tile installation video Part 3'.

The first two minutes of this video clip shows the process of setting out the room using the standard technique we've described above.

You'll notice the narrator says that the floor will fit 7 full tiles across the width and 11 full tiles along the length. However, he decides to change the set-out so that there's only 6 full tiles widthwise and 10 full tiles lengthwise.

Why does he change the layout?

Keep this point in mind when you go to the next lesson and learn about the situations when it's best to move the starting point away from the true centre point in a room.

hearing icon